GM Longroof Forum
Would you like to react to this message? Create an account in a few clicks or log in to continue.


HomeHome  PortalPortal  GalleryGallery  Latest imagesLatest images  SearchSearch  RegisterRegister  Log in  


 T-56 Console Work

Go down 
2 posters
AuthorMessage
JaySS
Admin
JaySS


Posts : 428
Join date : 2009-01-06

T-56 Console Work Empty
PostSubject: T-56 Console Work   T-56 Console Work Icon_minitimeSun Jan 29, 2012 3:18 pm

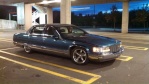
With all of the Bravada console installations being discussed lately, it would be a good time to share some pics. This is an Impala T-56 console modification that was done in trade for the fiberglass hood now on the wagon.

We started off with a ’96 console already using the F2B offset adapter and a BBHP console insert with the C5 boot. For those that haven’t seen, or don’t remember them, it looked pretty much like this, even using the same C6 shift knob (although in much better condition that the mess seen in these examples found over @ ISSF).

T-56 Console Work PC210391-1

T-56 Console Work PC210390

The owner wanted to incorporate the Bonneville seat controls into his console, much easier said than done, as there is too little room forward of the shifter to mount it like is often done using the automatic shift plate. And the sloped section leading up to the armrest behind the shifter is both curved and tapered, making the it difficult to fit the keypad without gaps everywhere once it is in.

At the time this project started, the C5 boots were unavailable, and the owner wanted to keep his C6 shift knob. Using the C6 knob up to then was a bit of a kludge, as the C5 boot was basically stretched over the C6 knob until it is just short of tearing, and because the fit was off, it didn’t look that good. We wanted to incorporate a C6 boot to take advantage of the retaining ring feature that couples the boot and knob together.

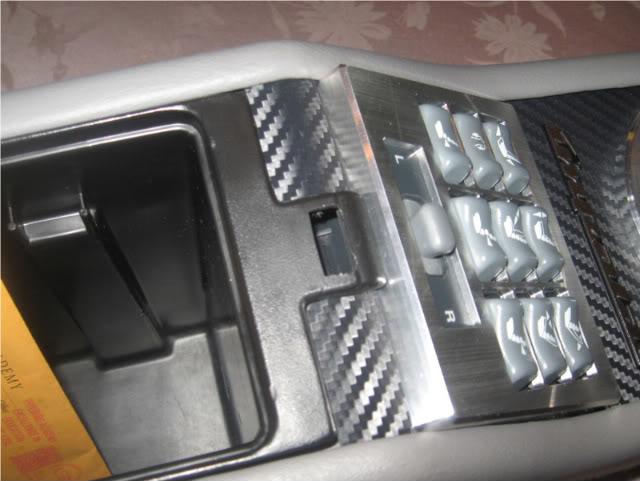
We began by cutting material out of the sloped portion of the console to make enough room for the Bonneville seat controller. To get enough depth to fill in the curved portion, we then milled a completely new bezel for the keypad out of billet aluminum. By recessing the pad into the bezel, the sides were then tall enough to fill the gap between the flat button surface and the concave console. As you can imagine, this takes more that just an evening or two on manual machine to accomplish, utilizing a 2-axis CNC to make it happen.

T-56 Console Work Picture217

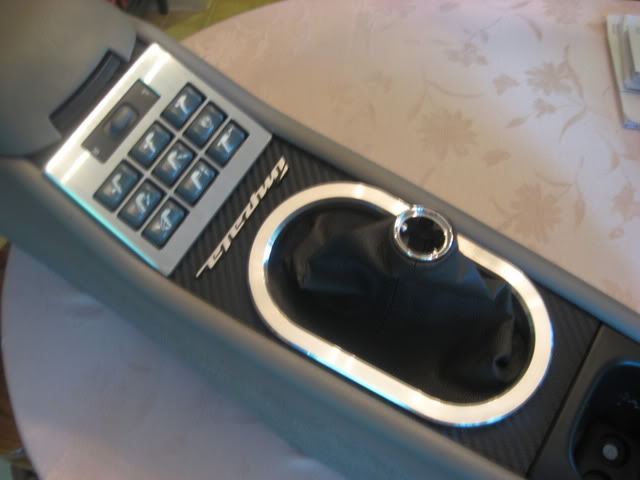
We then took the C6 shift boot and carved out a retaining ring that enables the boot to mount from the underside, and dresses up the console opening.

T-56 Console Work Picture214

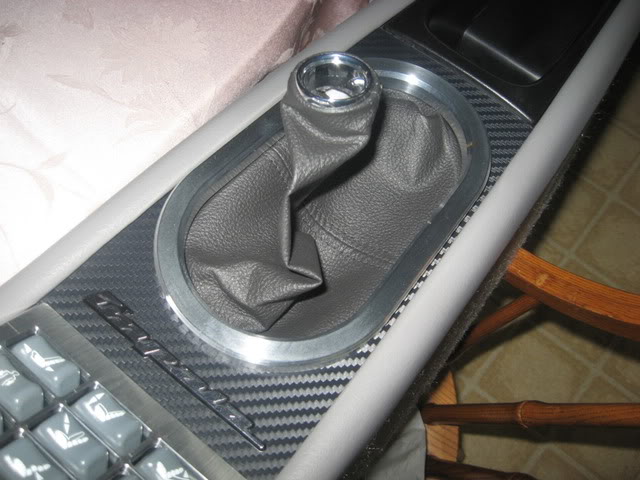
Next, we cut a new lower insert to mount the shifter & ring, and fabricated a filler piece to bridge the gap between the console latch area and the upper bezel.

T-56 Console Work Picture225

We purchased a sheet of the expensive 3M embossed sheeting to give the insert & filler a carbon fiber look, and finished off the installation with the addition of a W-body Impala dash emblem.

T-56 Console Work Picture221

T-56 Console Work Picture220

Enjoy.

- J
Back to top Go down
Guest
Guest


T-56 Console Work Empty
PostSubject: Re: T-56 Console Work   T-56 Console Work Icon_minitimeSun Jan 29, 2012 3:55 pm

Enjoying a bunch J,that is some very impressive work.The bezel was pretty ingenious the way
you worked around the curvature of the console.Was there a program created for the CNC because I am pretty sure you could sell a bunch of bezels.That console sure makes the rest of the interior look kinda drab.Hope you were paid more than just the hood because thats what
the custom builders get big money for.One last qestion,how thick were the 2 pieces because I
cant really tell?The finish is perfect on the bezel,not real shiny.
Thanks J
Jim
Back to top Go down
toomanytoyz

toomanytoyz


Posts : 3233
Join date : 2008-11-04
Age : 47
Location : Sandown, NH USA

T-56 Console Work Empty
PostSubject: Re: T-56 Console Work   T-56 Console Work Icon_minitimeSun Jan 29, 2012 4:39 pm

That looks like a lot of work! Very nice work indeed.

I'm sure Larry loves it! Smile
Back to top Go down
JaySS
Admin
JaySS


Posts : 428
Join date : 2009-01-06

T-56 Console Work Empty
PostSubject: Re: T-56 Console Work   T-56 Console Work Icon_minitimeMon Jan 30, 2012 12:45 pm

Flasheroo wrote:
Was there a program created for the CNC because I am pretty sure you could sell a bunch of bezels.

Yes, but I turned over the drawings and will erase the programs. Building one was enough.

Flasheroo wrote:
Hope you were paid more than just the hood because thats what the custom builders get big money for.

Let's just say a deal is a deal & I stuck to it (but I could have easily had a brand new hood if I was working at McD's for the same amount of time).

Flasheroo wrote:
One last qestion,how thick were the 2 pieces because I cant really tell?

Both started with 1/2" plate. The bezel is resting on .100" mounting flanges on each side. The ring is about 3/8" above the plate with the rest lining the sides of the opening and has a lower radiused edge to prevent chafing the boot.

toomanytoyz wrote:
That looks like a lot of work! Very nice work indeed. I'm sure Larry loves it! Smile

He seems to. He was supposed to forward some pics of it installed - I'll post them once they arrive.

- J
Back to top Go down
Guest
Guest


T-56 Console Work Empty
PostSubject: Re: T-56 Console Work   T-56 Console Work Icon_minitimeMon Jan 30, 2012 1:50 pm

Thanks J,hate these TV shows where the operator pushes a few buttons and 3 hours later out
pops a beautiful part.Have yet to see anyone really show the true amount of work involved prior to pushing those buttons.High dollar machines are useless without engineering and mad math
skills.
Jim
Back to top Go down
Sponsored content


T-56 Console Work Empty
PostSubject: Re: T-56 Console Work   T-56 Console Work Icon_minitime

Back to top Go down
 
T-56 Console Work
Back to top 
Page 1 of 1
 Similar topics
-
» ss console
» 94 vs 96 console in RMW?
» Got a Riv Console
» My Console Install
» some pics of riv console going in

Permissions in this forum:You cannot reply to topics in this forum
GM Longroof Forum :: Longroof Tech :: Member Projects-
Jump to: