Like pretty much everyone, I had to beat the crossmember out of my 96 RMW with a big hammer. Did not want to be putting it back in with that kind of fit, so since I had some dead time right now while still waiting for the block to get back from machining I decided to see what was hanging it up and what could be done about it.
I did take a quick look at the tubular ones, but if the pix I saw are representative of them, the engineer in me set off bells. The OEM is obviously structural to the frame from it's construction. Heavy gauge steel, boxed, and basically huge compared to just holding up a tailshaft needs. The tubulars looked like support only by comparison, so I decided not to pursue that option.
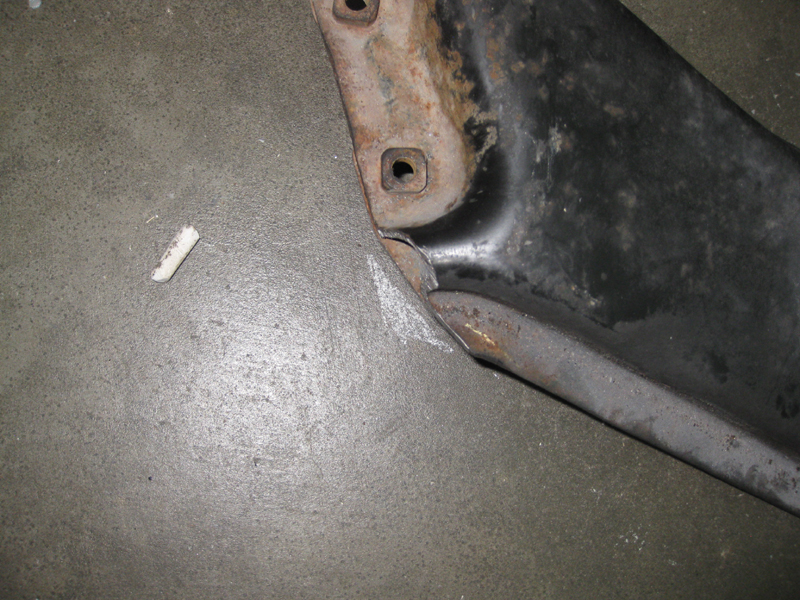
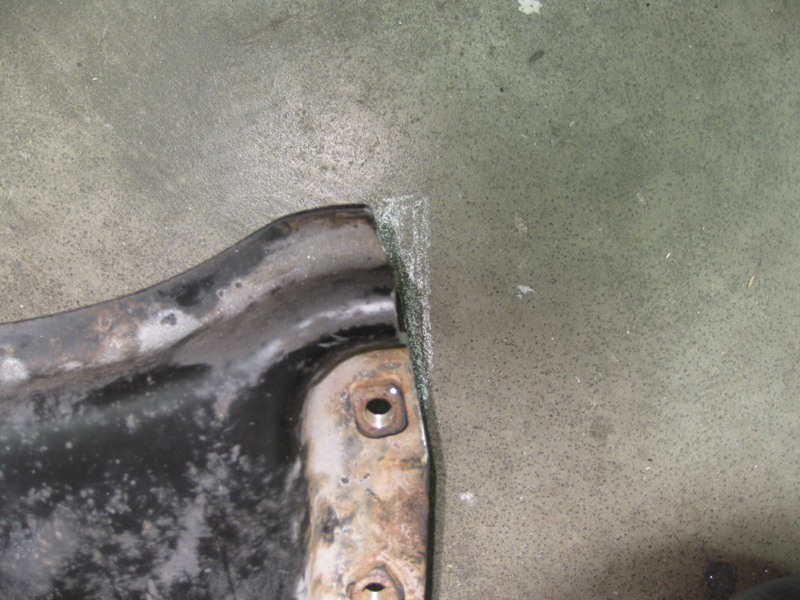
I knew from taking it out where I thought the interferences were, and I was partially correct. Before starting, I trimmed the front flange corner on the passenger side a bit and the rear corner of the driver side. Basically trying to generate a pair of parallel edges the distance apart that the frame rails in the area where the member sits during removal.
As it turns out, there was no way to get the member to that place on reinstall test. I figured out eventually it had nothing whatever to do with flange interference issues and was totally because the top of the member was hitting the floor if back far enough to get onto frame stepdown. The big recess for it ends too early toward the rear to allow it to move to there.
I then lined up the flange under the frame at that point on the frame where it narrows and it looked to clear the frame. I put a jack under it there on the passenger side and jacked it up slowly to the level where the flange would go over the frame, gave it a shove with my hand, and it went right in. All good.
Then went to removal test and it wouldn't come out easily, as it still wouldn't move back far enough and there was no way to get it there as the jack lift didn't do any good. It turns out where it hits the floor is tapered up toward the front and it needs to go over that angle but it just slides back to the front when you move it back. I was able to use a pry bar where it stopped moving back and with a bunch of effort it popped out because of the trimmed area finally clearing.
I then went back and trimmed another 3/16" off the front corner area on the passenger side as that is about how far I had to pry it. I was then able to put it in by hand, with no jack, as it was all in the floor recess. Super easy.
Did another remove test, and it did not come out completely by hand because the brake cables on the driver side frame top were springy and held it over a little. A tiny pry with prybar and it came right out easily.
All this was done with no engine or trans in place and the exhaust hanging, but should clear when the parts are back in, I think.
All in all about 10 minutes of hacksawing and an hour worth of work for it all, so super easy to do. Looking forward to putting it back in for real now instead of dreading it.
Passenger side

Driver side

