| | It looks better than when I started... |  |
|
+7Lynol 81X11 jayoldschool Cadet57 toomanytoyz BigBlackBeaSSt 95BRMW 11 posters |
| Author | Message |
|---|
95BRMW
Posts : 1695
Join date : 2009-08-15
Age : 40
Location : Connecticut
| Subject: It looks better than when I started...  Tue Jun 14, 2011 7:56 am Tue Jun 14, 2011 7:56 am | |
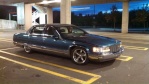
| I picked up a free can of 2 part clear coat from work that was left over from painting a part on a van we had. This particular brand of clear has a few hour shelf life once you activate it, so I had to act quick to put it to use. I had been told by a friend of mine who sells automotive paint for a living that you can't simply clear coat over a bad paint job, I wasn't about to believe that. My victim was my OCC, its roof was chalky, and I figured anything I could do to it would make it look better. If this didn't work, its next step was a rattle can paint job (like a certain purple cruiser on here  ) So I give you for your "entertainment", Dave's half ass approach to paint. Anyone who knows what they are doing may want to stop reading now to avoid going insane. I had barely any time after work to do this, so it was now or never for this can, after I pulled the rack off, I cleaned the roof with window cleaner and a rag. 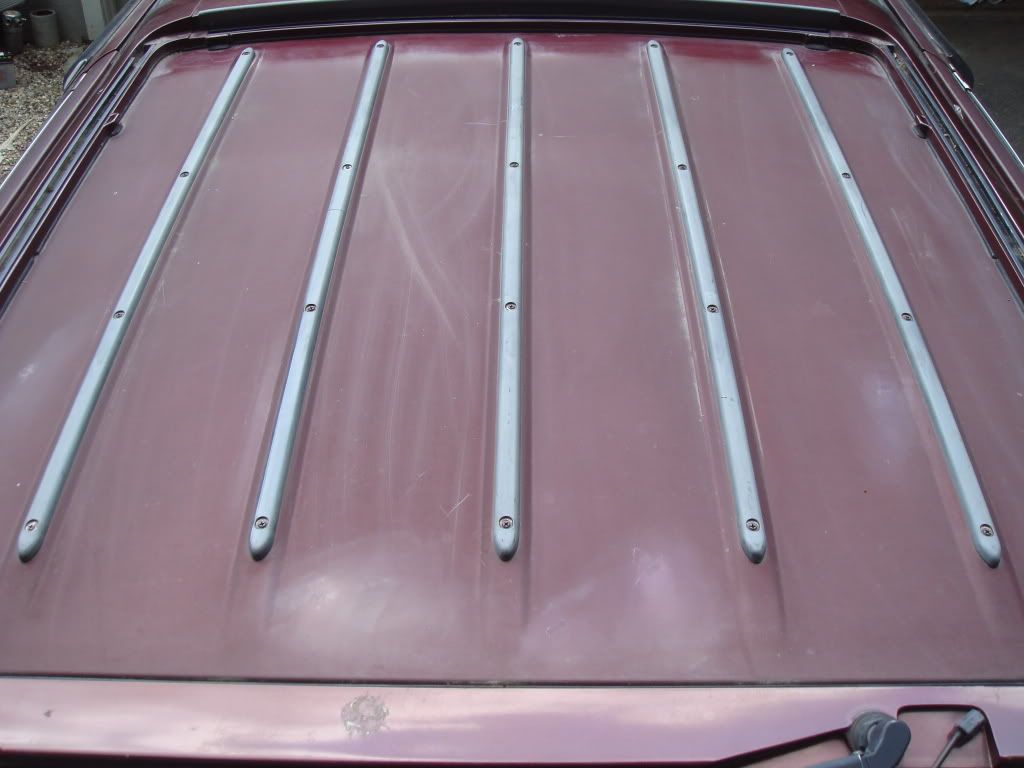 I then taped off the area around the rack. 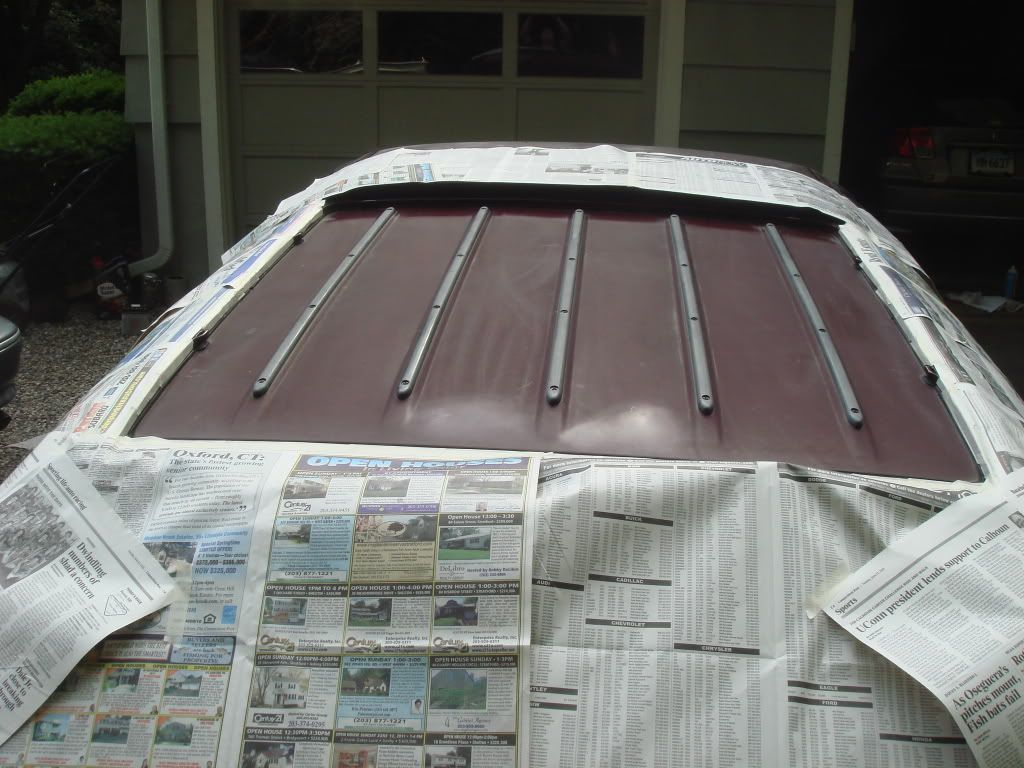 The news mobile: 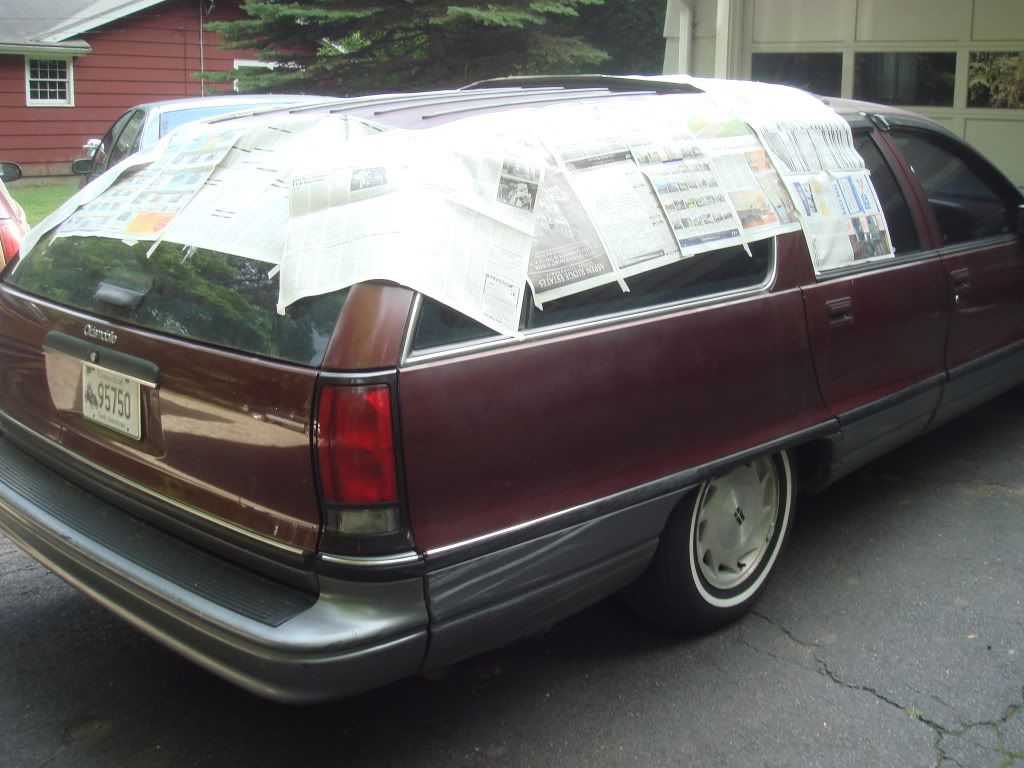 Time to start spraying. For best results I did this in the driveway, under a tree and with a good breeze blowing. Any overspray that gets elsewhere on the car can only help its 20 year old paint. And any crap from the tree gives it a nice sand effect! 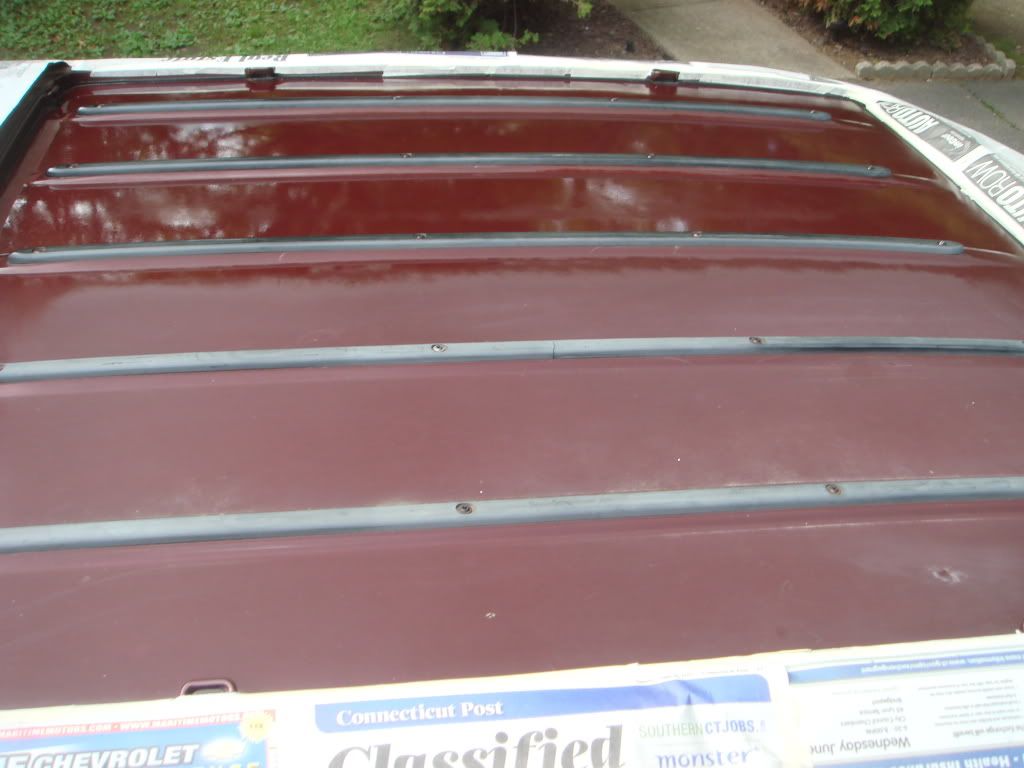 1st and second coat, notice how I went right over the plastic rub protectors: 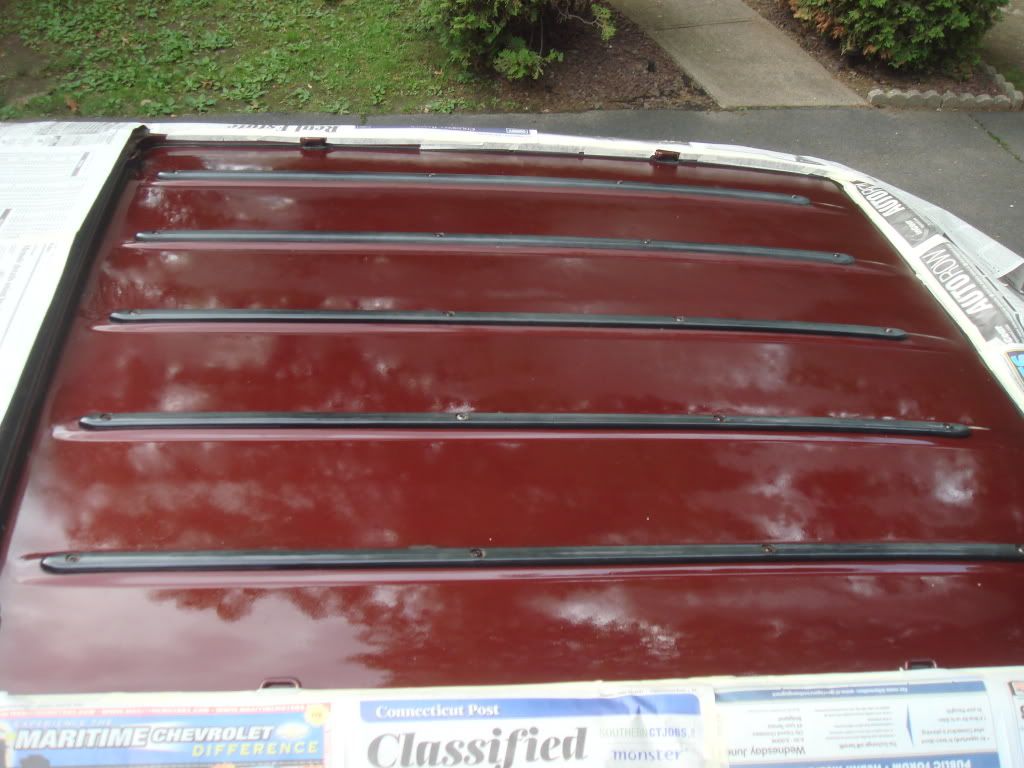 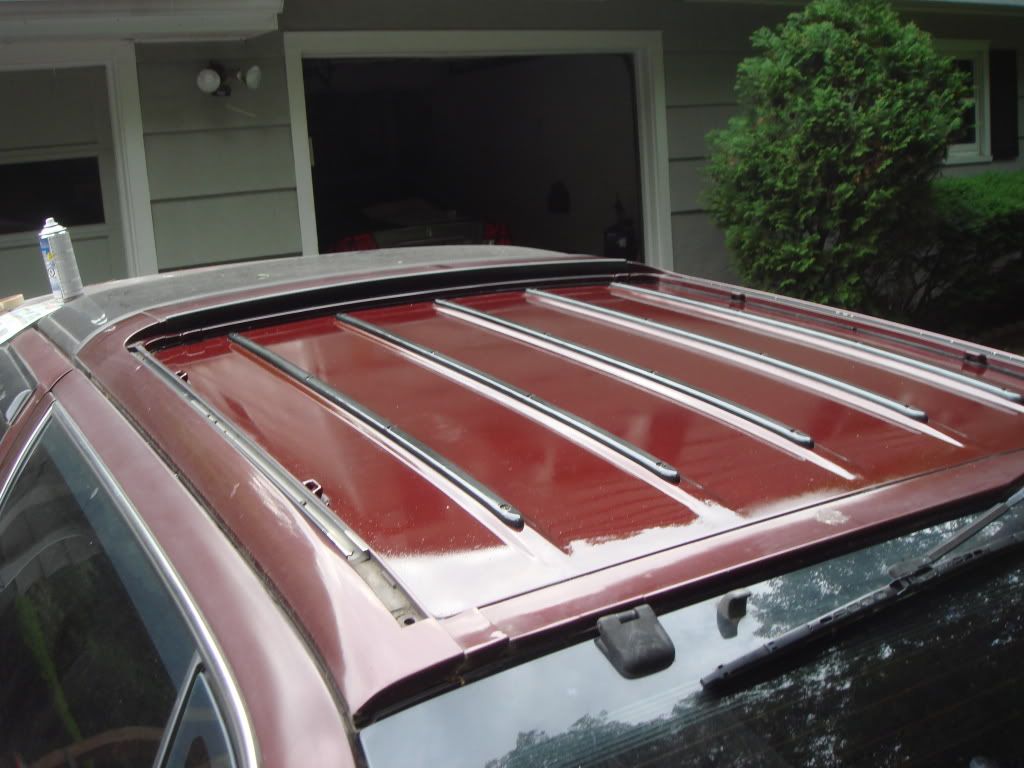 And the final result in now poor lighting: 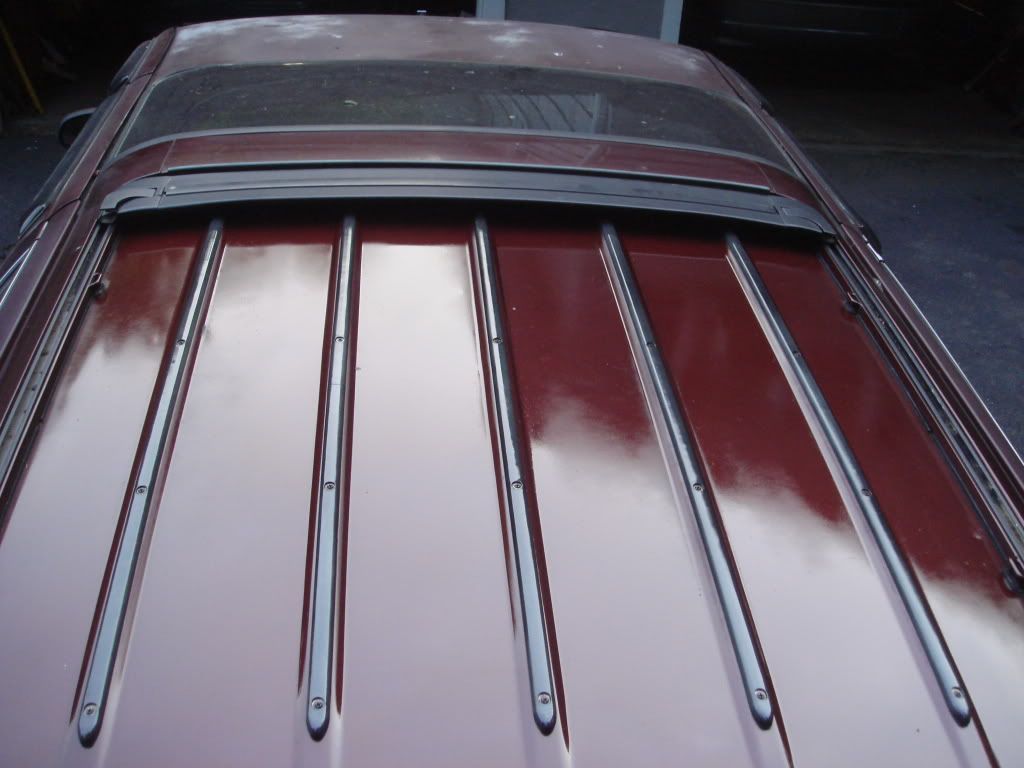 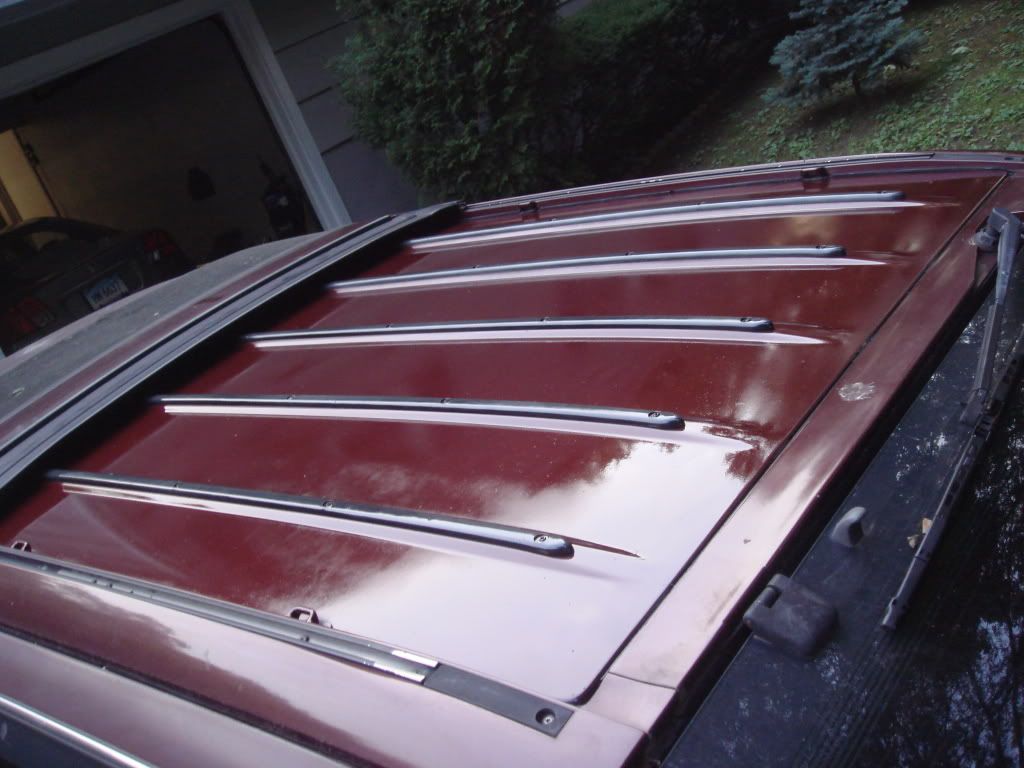 I had a bit left, time to hit the DS B pillar, it looked as bad as the roof did 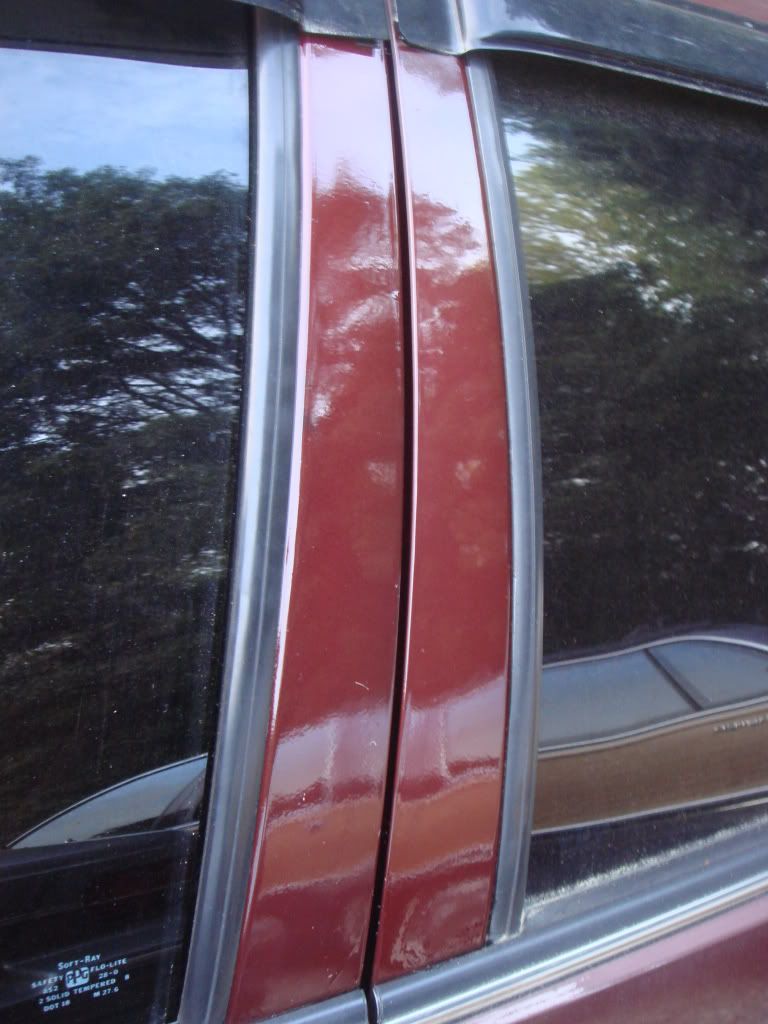 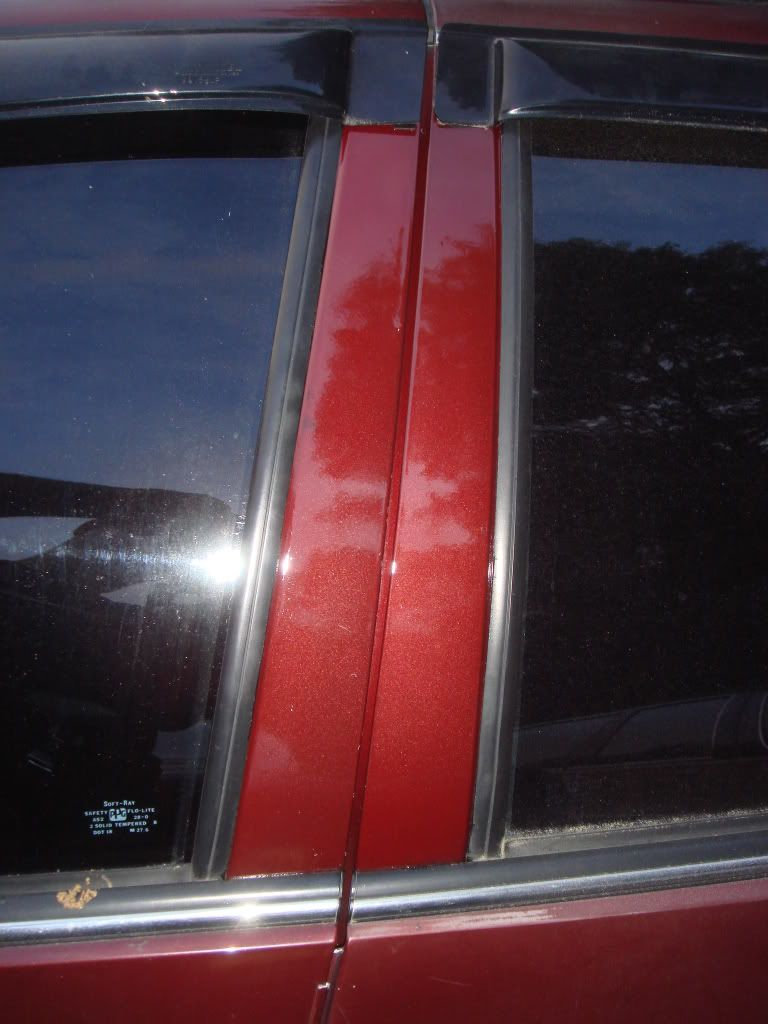 All in all, I am impressed that it worked at all. If I had done ANY prep work (not used a linty rag), and had taken my time to apply it evenly, it would have came out pretty good. The area by the hatch is the best looking and the smoothest, probably because I could get the best access to it. And the B-pillar came out great, too bad I layed it a bit too thick and got a run in it. What would I have done different? Less news paper. Any overspray that landed on it was wasted as the whole car needs help. And hey, it may not look great, but it looks a hell of a lot better than it did before! | |
|
| | |
BigBlackBeaSSt

Posts : 4560
Join date : 2009-08-01
Age : 59
Location : Sanford, NC
| | Subject: Re: It looks better than when I started... Tue Jun 14, 2011 8:25 am | |
| Looks great David..... Amazing what can be done with a rattle can!! Keep us posted on how it holds up in the sun.......... | |
|
| | |
Guest
Guest
| | Subject: Re: It looks better than when I started... Tue Jun 14, 2011 8:27 am | |
| I am surprised.
That looks good in photos. |
|
| | |
toomanytoyz
Posts : 3233
Join date : 2008-11-04
Age : 48
Location : Sandown, NH USA
| | Subject: Re: It looks better than when I started... Tue Jun 14, 2011 8:42 am | |
| Well it certainly doesn't look worse!  | |
|
| | |
Cadet57

Posts : 3047
Join date : 2010-04-13
Age : 37
Location : Chicopee, MA
| | Subject: Re: It looks better than when I started... Tue Jun 14, 2011 8:50 am | |
| Wow that looks really good. | |
|
| | |
jayoldschool

Posts : 2728
Join date : 2009-06-14
| | Subject: Re: It looks better than when I started... Tue Jun 14, 2011 9:03 am | |
| Breathtaking!
lol... for the Seinfeld fans. | |
|
| | |
Guest
Guest
| | Subject: Re: It looks better than when I started... Tue Jun 14, 2011 9:06 am | |
| Huge improvement David!What was the name of the product that you used?Do you have any
idea how much it cost?
Jim Gordon |
|
| | |
95BRMW
Posts : 1695
Join date : 2009-08-15
Age : 40
Location : Connecticut
| | Subject: Re: It looks better than when I started... Tue Jun 14, 2011 9:36 am | |
| The stuff I used is "MAX 2K Clear Coat". Brags about quick dry time, UV protection, and fuel resistant. The link below is the place my work bought it from which is actually a place my friend's uncle owns. It was $20 for a can of it, it looked awesome on the new paint I did at work with it. http://paintworldinc.com/itemdetail.aspx?sku=SMX.3680062 | |
|
| | |
81X11
Posts : 9876
Join date : 2010-06-23
Age : 50
Location : Round Rock Texas
| | Subject: Re: It looks better than when I started... Tue Jun 14, 2011 9:51 am | |
| Nice work! It looks a LOT better! | |
|
| | |
Lynol
Posts : 768
Join date : 2010-06-29
Age : 41
Location : Central New Jersey
| | Subject: Re: It looks better than when I started... Tue Jun 14, 2011 9:54 am | |
| Damn that does look good. Bill told me the same thing about not clear-coating over paint that lost it's original clear coat, but now that I see this I wish I'd have just tried a little wet sanding and re-clear-coating on my C pillar and mirrors that I re-painted last year. I think I might have to try that on my roof rack trim rather than repainting it. I've got nothing to loose. | |
|
| | |
Guest
Guest
| | Subject: Re: It looks better than when I started... Tue Jun 14, 2011 11:14 am | |
| David if I read the intro correctly,once the mix is activated the contents of the can have to
used completely within 24 hours?Have no expierence with this stuff so forgive!
Jim Gordon |
|
| | |
95BRMW
Posts : 1695
Join date : 2009-08-15
Age : 40
Location : Connecticut
| | Subject: Re: It looks better than when I started... Tue Jun 14, 2011 1:07 pm | |
| - Flasheroo wrote:
- David if I read the intro correctly,once the mix is activated the contents of the can have to
used completely within 24 hours?Have no expierence with this stuff so forgive!
Jim Gordon Thats right, it had a button on the bottom that mixes the activator with the clear coat and after 24hrs the stuff in the can hardens. | |
|
| | |
Guest
Guest
| | Subject: Re: It looks better than when I started... Tue Jun 14, 2011 4:15 pm | |
| Thats pretty neat and it definitely looks a whole lot better but is it worth 20 bucks a can?Know
you got it for free.Went on Amazon and there is a bunch of different products available at a
varied price range.Kinda like your results but does this stuff have a short shelf life prior to
activation?
Jim Gordon |
|
| | |
Sprocket
Posts : 6141
Join date : 2008-11-04
Location : Palm Beach County
| | Subject: Re: It looks better than when I started... Tue Jun 14, 2011 4:55 pm | |
| - 95BRMW wrote:
- Time to start spraying. For best results I did this in the driveway, under a tree and with a good breeze blowing.
LOL, that's MY secret spray booth!! | |
|
| | |
BigWagon

Posts : 93
Join date : 2011-03-24
Age : 56
Location : Overland Park KS
| | Subject: Re: It looks better than when I started... Tue Jun 14, 2011 5:14 pm | |
| I like the fact that one of the newspaper sections you used has "Chevrolet Difference" on it. | |
|
| | |
95BRMW
Posts : 1695
Join date : 2009-08-15
Age : 40
Location : Connecticut
| | Subject: Re: It looks better than when I started... Tue Jun 14, 2011 5:42 pm | |
| - Flasheroo wrote:
- Thats pretty neat and it definitely looks a whole lot better but is it worth 20 bucks a can?Know
you got it for free.Went on Amazon and there is a bunch of different products available at a
varied price range.Kinda like your results but does this stuff have a short shelf life prior to
activation?
Jim Gordon If it was a real paint job, probably. For this type of thing its a waste seeing as a color matched can of paint is another $5. Might pickup some cheap stuff at the parts store and try elsewhere to see what it looks like. The can says 36 month shelf life before activation. - BigWagon wrote:
- I like the fact that one of the newspaper sections you used has "Chevrolet Difference" on it.
Would have been even better if this was my Caprice LOL. | |
|
| | |
phantom 309
Posts : 5848
Join date : 2008-12-28
Age : 114
| | Subject: Re: It looks better than when I started... Tue Jun 14, 2011 9:20 pm | |
| It'll be interesting to see how it holds up after baking for a couple of months, and mebbe a few runs thru 70 mph rain storms etc,..
nick | |
|
| | |
sherlock9c1
Posts : 2399
Join date : 2009-05-28
Location : Huntsville, AL
| | Subject: Re: It looks better than when I started... Tue Jun 14, 2011 11:11 pm | |
| Wait a few days and then rub it out a bit. I think you will see even more improvement.
The biggest problem with paint is that it's either $$$$$$ or $ with no inbetween. If you have a car that already looks horrible paint-wise, you might as well cheapy it here and there over time to keep it up.
Again, put a little elbow grease on it in a few days. | |
|
| | |
Sponsored content
| | Subject: Re: It looks better than when I started... | |
| |
|
| | |
| | It looks better than when I started... | |
|