| | Which Opera light looks better~UPDATE~ Installed! |  |
|
+10DBeaSSt JaySS Andebe Fred Kiehl mtrhead79 buickwagon 81X11 lakeffect buickestate Wagoninabox 14 posters |
| Author | Message |
|---|
Wagoninabox
Posts : 509
Join date : 2011-07-11
Location : Seattle Area
 |  Subject: Which Opera light looks better~UPDATE~ Installed! Subject: Which Opera light looks better~UPDATE~ Installed!  Sun Aug 04, 2013 7:39 pm Sun Aug 04, 2013 7:39 pm | |
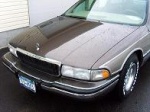
| Just getting to this project. This is on the flyaway trim of the Roadmaster. The first photo is with the bright trim that currently surrounds the light. That would be the easiest install. The second is a routed flyaway trim and the EL opera light inserted. I think it looks more factory but will take a bit more work. What do you all think?  
Last edited by Wagoninabox on Fri Feb 20, 2015 11:27 pm; edited 1 time in total | |
|
  | |
buickestate
Moderator

Posts : 3301
Join date : 2008-11-04
Age : 60
Location : Chatham Ontario
 |  Subject: Re: Which Opera light looks better~UPDATE~ Installed! Subject: Re: Which Opera light looks better~UPDATE~ Installed!  Sun Aug 04, 2013 10:32 pm Sun Aug 04, 2013 10:32 pm | |
| | |
|
  | |
Guest
Guest
 |  Subject: Re: Which Opera light looks better~UPDATE~ Installed! Subject: Re: Which Opera light looks better~UPDATE~ Installed!  Sun Aug 04, 2013 11:31 pm Sun Aug 04, 2013 11:31 pm | |
| What look are you going for because I like them both? |
|
  | |
Wagoninabox

Posts : 509
Join date : 2011-07-11
Location : Seattle Area
 |  Subject: Re: Which Opera light looks better~UPDATE~ Installed! Subject: Re: Which Opera light looks better~UPDATE~ Installed!  Sun Aug 04, 2013 11:59 pm Sun Aug 04, 2013 11:59 pm | |
| I want an opera light that looks like it was factory. Before they went out of favor, auto makers did less bezels and did more of inserting them into what would be existing trim. That is why I made the second one.
I am trying to perfect routing out the shape (using the donor metal bezel as a template) in the flyaway trim so it looks perfect and crisp. There is not an abundent supply of flyaway trim to practice on so I have been putting this off. This is the first one I made. I did pretty good with a dremel router and bit but am going to do another with an upcut spiral bit to see if I can get a smoother/quicker/sharper cut. I am a woodworker and do not normally work with cutting plastic so bit iffy for me. | |
|
  | |
lakeffect

Posts : 3892
Join date : 2009-08-18
Location : Rochester NY 14621
 |  Subject: Re: Which Opera light looks better~UPDATE~ Installed! Subject: Re: Which Opera light looks better~UPDATE~ Installed!  Mon Aug 05, 2013 7:16 am Mon Aug 05, 2013 7:16 am | |
| | |
|
  | |
Guest
Guest
 |  Subject: Re: Which Opera light looks better~UPDATE~ Installed! Subject: Re: Which Opera light looks better~UPDATE~ Installed!  Mon Aug 05, 2013 8:05 am Mon Aug 05, 2013 8:05 am | |
| Top light looks dated maybe from a 70s era ford,the lower is much more modern and appropriate for our
futuristic wagons. |
|
  | |
Guest
Guest
 |  Subject: Re: Which Opera light looks better~UPDATE~ Installed! Subject: Re: Which Opera light looks better~UPDATE~ Installed!  Mon Aug 05, 2013 9:43 am Mon Aug 05, 2013 9:43 am | |
| Bottom for sure.
This would be a cool mod, but maybe consider going with LEDs instead of the EL strip to really modernize it (also, they're more reliable) |
|
  | |
81X11
Posts : 9876
Join date : 2010-06-23
Age : 50
Location : Round Rock Texas
 |  Subject: Re: Which Opera light looks better~UPDATE~ Installed! Subject: Re: Which Opera light looks better~UPDATE~ Installed!  Mon Aug 05, 2013 10:13 am Mon Aug 05, 2013 10:13 am | |
| The second one looks great! Neat mod! | |
|
  | |
buickwagon
Posts : 958
Join date : 2011-06-10
Location : Muskoka, Ontario
 |  Subject: Re: Which Opera light looks better~UPDATE~ Installed! Subject: Re: Which Opera light looks better~UPDATE~ Installed!  Mon Aug 05, 2013 10:35 am Mon Aug 05, 2013 10:35 am | |
| - Wagoninabox wrote:
- I did pretty good with a dremel router and bit but am going to do another with an upcut spiral bit to see if I can get a smoother/quicker/sharper cut. I am a woodworker and do not normally work with cutting plastic so bit iffy for me.
Milling plastic is a bit different than milling metal or wood. Plastics have a tendency to re-weld, so chipload and feed rates are critical. Your feed has to be fast enough to prevent localized heating but not so fast as to overload the cutter with chips. Here's a nice guide for generic hard plastic: http://www.onsrud.com/plusdocs/Doc/index.html?model.code=Chipload_Hard_Plastic | |
|
  | |
mtrhead79

Posts : 1614
Join date : 2010-04-24
Age : 56
Location : phila. pa
 |  Subject: Re: Which Opera light looks better~UPDATE~ Installed! Subject: Re: Which Opera light looks better~UPDATE~ Installed!  Mon Aug 05, 2013 9:59 pm Mon Aug 05, 2013 9:59 pm | |
| 2nd one looks more like a factory option | |
|
  | |
Fred Kiehl

Posts : 7291
Join date : 2009-11-13
Age : 76
Location : Largo, FL 33774
 |  Subject: Re: Which Opera light looks better~UPDATE~ Installed! Subject: Re: Which Opera light looks better~UPDATE~ Installed!  Fri Aug 09, 2013 11:37 am Fri Aug 09, 2013 11:37 am | |
| The second one is my preference. First I cut an outline with an exacto #11 blade. If you cut away from the finished edge, you can get away with a lot. I cut the general shape with a cutoff wheel or saw, then finish it with a side mill in a dremel using sweeping motions. If you cut away from the finished edge, the plastic will make a flash toward the back side that you can remove without disturbing the finished surface. I have a couple of flyaway panel for sale if you need more. I only have one side available. | |
|
  | |
Wagoninabox

Posts : 509
Join date : 2011-07-11
Location : Seattle Area
 |  Subject: Re: Which Opera light looks better~UPDATE~ Installed! Subject: Re: Which Opera light looks better~UPDATE~ Installed!  Fri Feb 20, 2015 11:37 pm Fri Feb 20, 2015 11:37 pm | |
|  Finally! Got the opera lights made and installed! Why did I do this? I am the rare bird that always thought opera lights looked classy and belonged on luxury cars. I had opera lights on a few cars back in the day. So, in case anyone is interested, here is a run down of what I did. I scoured wrecking yards for other GM cars that had the type of opera light that would look good on the trim panel. I did not want to surface mount them as that style had chrome bezels and it would not look right on the wagon. I wanted to inset the lights into either the door flyaway trim or the C pillar trim. In hindsight, it would have been far easier to do this on the C pillar trim. You could use deeper and longer lights and have better access to wiring. Isn’t hindsight a bitch? I found surface mounted bezel-style on a mid 80’s Buick sedan (LeSabre) and after removing them found that the plastic front lens would be thin enough to fit behind the flyaway trim. I took all of the wiring to the lights; the wiring went all the way into the trunk to an 110 AC Inverter and then on to the power supply from the parking lights wiring. Here is the light with bezel as found on 80’s buicks:  To make my opera lights, I ordered some EL tape from the internet and followed the instructions I found on the internet at http://www.instructables.com/id/Rebuild-Your-Cars-EL-electroluminescent-Lights/step3/What-Youll-Need/The difference to the above instructables directions is that I was unable to use the backs of the original lights due to thickness. I had to create a new backing using ridged plastic but thin. I located some hobby store plastic sheeting and Lexol’d (High grade silicone) it together. Why EL tape? It is flat, bright and lights evenly. There is not enough room to use a miniature bulb(s) and LED’s would leave spots and not have an even light for these. I made the lights and the process repeatable so if/when I have a burned out light I can remove the trim and replace the EL tape in the lights. Here in the processing of making the lights:  The first test:  I then used a couple of sacrificial flyaway trims I nabbed from the wrecking yard. I messed around with cutting out the opening. Made a lot of mistakes. What I found to be the most effective is to make a template from the chrome bezel which originally fit over the lens and use a Dremel with a router bit. Patience and planning were my friends here. Once I got the angle and the cut correct, I removed the flyaway trim from my wagon and made the final cutouts. I then had both trim pieces repainted fresh. Dry fitting them. One with, one not cut out as comparison:  What they look like from the backs: 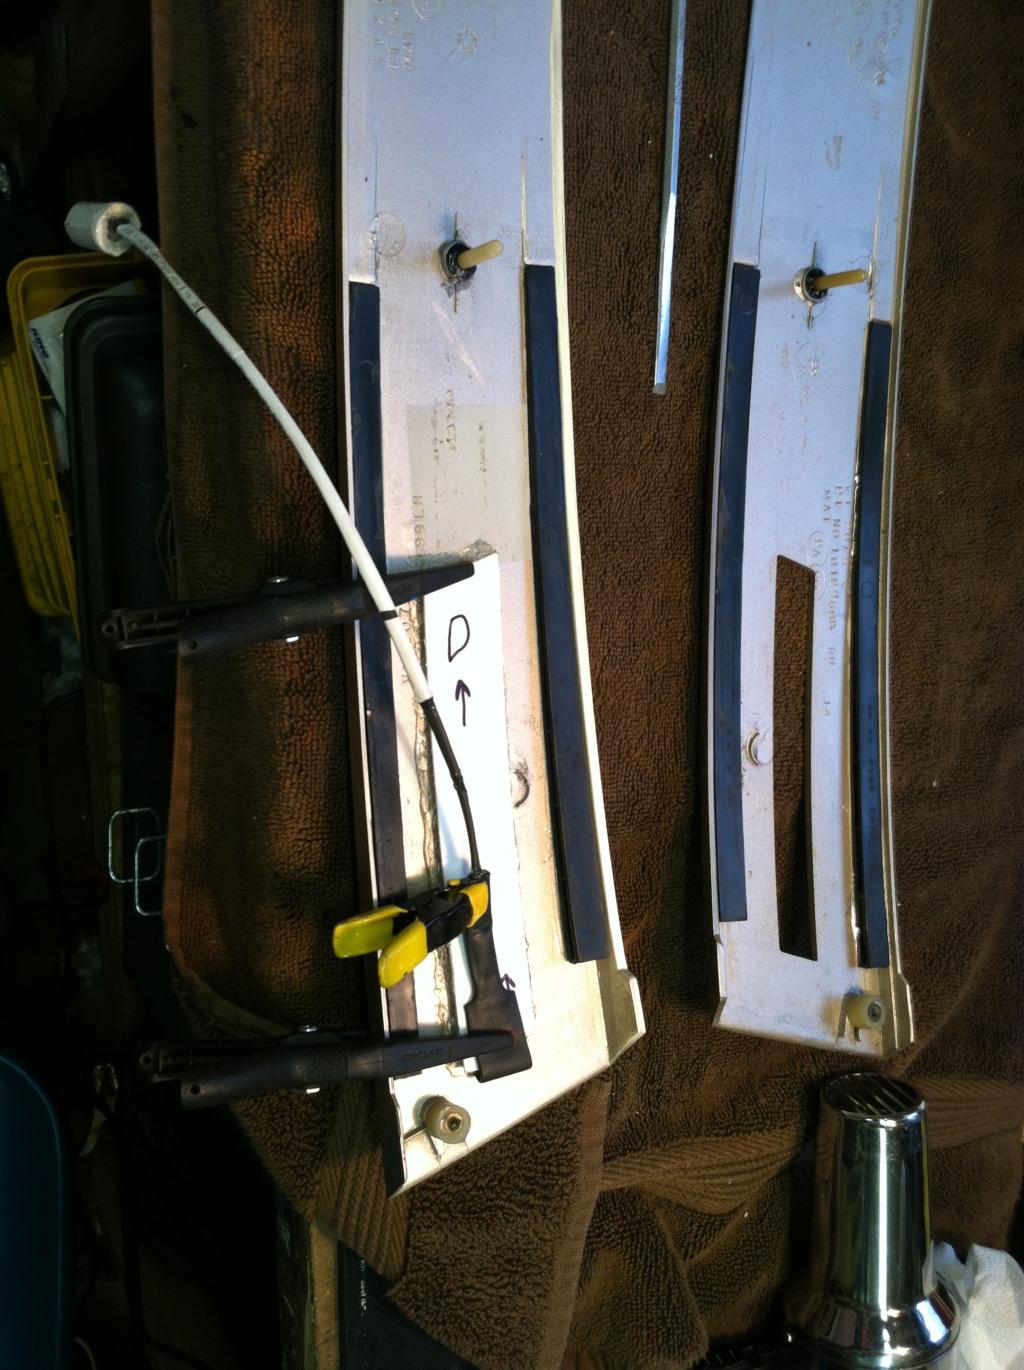 I had to remove rear seat bottom cushion, rear door panels (fun, fun), drivers side speaker cover and drivers said rear storage compartment. I ran the wires into the doors and channeled the balance of the wire loom with the inverter along the driver’s side back towards the taillights. I did this as it replicates how it was wired in the sedans. This also puts the inverter at right about the driver’s side rear speaker area in case it needs to be accessed easily in the future. I tapped into the parking lights in the taillight well and tested them and they worked! I fed the wiring down the lowest mounting pin retainer hole and used double stick tape to remount the flyaway trim but while installing them realized that I should have allowed more wiring so when I need to replace the EL tape I could pull the connector out and disconnect them outside of the door rather than having to take the darn door panels off to access the connectors. A few more shots of the lights in action:    If I were to do this again, I might consider using the Park Avenue opera lights as they are more readily available in the yards right now. I would also do this in the C pillar as it could all be done in half the time and look just as great. Here is a photo of what the Park Ave lights look like; the wording could be buffed off.  | |
|
  | |
Fred Kiehl

Posts : 7291
Join date : 2009-11-13
Age : 76
Location : Largo, FL 33774
 |  Subject: Re: Which Opera light looks better~UPDATE~ Installed! Subject: Re: Which Opera light looks better~UPDATE~ Installed!  Sat Feb 21, 2015 7:13 am Sat Feb 21, 2015 7:13 am | |
| They look well done, but I would have put them further up on the pillar. The look a little odd at the bottom. | |
|
  | |
Andebe

Posts : 3323
Join date : 2013-02-20
Age : 55
Location : Centerville, IN
 |  Subject: Re: Which Opera light looks better~UPDATE~ Installed! Subject: Re: Which Opera light looks better~UPDATE~ Installed!  Sat Feb 21, 2015 1:04 pm Sat Feb 21, 2015 1:04 pm | |
| The work is well done,but in this case I think size matters. The scale is too off for me. But,thats just this guys opinion.
| |
|
  | |
Wagoninabox

Posts : 509
Join date : 2011-07-11
Location : Seattle Area
 |  Subject: Re: Which Opera light looks better~UPDATE~ Installed! Subject: Re: Which Opera light looks better~UPDATE~ Installed!  Sat Feb 21, 2015 2:27 pm Sat Feb 21, 2015 2:27 pm | |
| Thanks. There was not a millimeter more height that I could have place it as the flyaway trims narrow down thinner towards the mid section. There just is not the room to center them. I like the placement as it is the same on the Park Avenue, Regal, LeSabers, Ninety-Eights, etc. that GM did.
I favored the early 90's Cadillac long center lights (like the pics in my first posting); it could be done on the C pillar but locating the lenses proved beyond difficult. | |
|
  | |
JaySS
Admin

Posts : 430
Join date : 2009-01-06
 |  Subject: Re: Which Opera light looks better~UPDATE~ Installed! Subject: Re: Which Opera light looks better~UPDATE~ Installed!  Sat Feb 21, 2015 4:17 pm Sat Feb 21, 2015 4:17 pm | |
|
I like them.
Its rare that someone thinks up something outside the box, and we've been overdue for something diffferent.
Those Park Avenue lights placed in the C-pillars look like they would have most folks thinking they came that way from the factory,
Nice work,
- J
| |
|
  | |
Andebe

Posts : 3323
Join date : 2013-02-20
Age : 55
Location : Centerville, IN
 |  Subject: Re: Which Opera light looks better~UPDATE~ Installed! Subject: Re: Which Opera light looks better~UPDATE~ Installed!  Sat Feb 21, 2015 6:49 pm Sat Feb 21, 2015 6:49 pm | |
| - JaySS wrote:
I like them.
Its rare that someone thinks up something outside the box, and we've been overdue for something diffferent.
Those Park Avenue lights placed in the C-pillars look like they would have most folks thinking they came that way from the factory,
Nice work,
- J Leave it to a Wagoninabox to think outside of the box! | |
|
  | |
Guest
Guest
 |  Subject: Re: Which Opera light looks better~UPDATE~ Installed! Subject: Re: Which Opera light looks better~UPDATE~ Installed!  Sat Feb 21, 2015 11:32 pm Sat Feb 21, 2015 11:32 pm | |
| To me they add a quiet elegance to our wagons thats seems to make them appear more modern without being over the top.
NICE MOD! |
|
  | |
DBeaSSt
Admin

Posts : 2585
Join date : 2008-11-04
Age : 54
Location : Front Royal, VA
 |  Subject: Re: Which Opera light looks better~UPDATE~ Installed! Subject: Re: Which Opera light looks better~UPDATE~ Installed!  Sun Feb 22, 2015 9:48 am Sun Feb 22, 2015 9:48 am | |
| Nice mod and thanks for sharing the details! | |
|
  | |
1993 Roady-man
Posts : 2126
Join date : 2009-05-26
Age : 57
Location : Hogansburg, Ny 13655
 |  Subject: Re: Which Opera light looks better~UPDATE~ Installed! Subject: Re: Which Opera light looks better~UPDATE~ Installed!  Mon Feb 23, 2015 1:37 pm Mon Feb 23, 2015 1:37 pm | |
| | |
|
  | |
phantom 309

Posts : 5848
Join date : 2008-12-28
Age : 114
 |  Subject: Re: Which Opera light looks better~UPDATE~ Installed! Subject: Re: Which Opera light looks better~UPDATE~ Installed!  Mon Feb 23, 2015 3:25 pm Mon Feb 23, 2015 3:25 pm | |
| Kudo's for your mod,.
BUT,....?
I agree they are too far down , i do understand space constraints,.
I think personally they would look better midway up the 'C; pillar,.or "B' pillar. | |
|
  | |
steel-and-fire
Posts : 240
Join date : 2013-07-08
Age : 36
Location : Staten Island, NY
 |  Subject: Re: Which Opera light looks better~UPDATE~ Installed! Subject: Re: Which Opera light looks better~UPDATE~ Installed!  Thu Mar 26, 2015 11:49 am Thu Mar 26, 2015 11:49 am | |
| Gonna follow the consensus: neat idea but looks a bit odd so low. In the middle would seem more balanced.
Have to admit, I might need to do this for Firefly. I have the stainless trim on the B and C pillar. Either one would be perfect spots. | |
|
  | |
Sprocket

Posts : 6141
Join date : 2008-11-04
Location : Palm Beach County
 |  Subject: Re: Which Opera light looks better~UPDATE~ Installed! Subject: Re: Which Opera light looks better~UPDATE~ Installed!  Thu Mar 26, 2015 1:17 pm Thu Mar 26, 2015 1:17 pm | |
| Nice write and a nice mod, although I agree with you that the C pillar would be a better spot.
I saw a set on a RMW in Orlando last July although they were surface mounted (pretty sure it was a former flower car as it was a WB4 in black). Unfortunately, the car was totaled a week after I met the owner (t-boned by red light runner). I have a pic on my laptop at home I'll dig it out. | |
|
  | |
Wagoninabox

Posts : 509
Join date : 2011-07-11
Location : Seattle Area
 |  Subject: Re: Which Opera light looks better~UPDATE~ Installed! Subject: Re: Which Opera light looks better~UPDATE~ Installed!  Thu Mar 26, 2015 9:30 pm Thu Mar 26, 2015 9:30 pm | |
| Thanks for the feedback all! I love them and if you saw them in person you would absolutely think they were factory. Just did an 1800 mile trip and received some positive comments when pulled into rest stops at night including one young man that thought it was cool that I was road tripping in a limo! Anyone wanting to attempt this (at whatever location on the wagon they want), PM me and we can talk in person about what all is involved. I studied the opera light situation pretty well before doing this mod. I found that a majority of Buick and Caddy opera lights were placed low. A few models towards the end of the opera lights era were centered. Chrysler on the other hand, almost exclusively centered theirs. A couple of Buick examples: 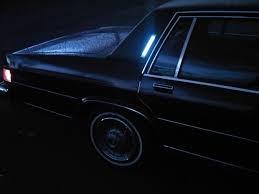  Caddy example:  Chrysler did put Opera Lights on the back edge of the rear door on the last of their full-sized sedans so what I did is not unheard of:  My goal was twofold, to add the most substantial sized light I could in whatever space I could find; secondly, I wanted to do it without drilling holes and not upset anything factory. This entire mod can be removed and there would be no evidence it was ever there right down to the way I added wires from the taillight pigtail. I saved the original Flyaways to put back on and all the wiring can be pulled to plug and play in another wagon if I so choose. I appreciate all the feedback. I am in the preliminary stages of doing the mod on my other wagon but in the C pillar trim. There is slightly more space but a hole would have to be drilled through the quarter window leading edge that is covered by the trim and I am still unsure I want to do that. | |
|
  | |
phantom 309

Posts : 5848
Join date : 2008-12-28
Age : 114
 |  Subject: Re: Which Opera light looks better~UPDATE~ Installed! Subject: Re: Which Opera light looks better~UPDATE~ Installed!  Sun Mar 29, 2015 10:47 am Sun Mar 29, 2015 10:47 am | |
| It;s one of those personal mods,.
As long as you like it,. its all good,.
As for the young man and the limo comment,. he's young, and not old enough, or experienced enough to form an educated opinion,. | |
|
  | |
buickwagon

Posts : 958
Join date : 2011-06-10
Location : Muskoka, Ontario
 |  Subject: Re: Which Opera light looks better~UPDATE~ Installed! Subject: Re: Which Opera light looks better~UPDATE~ Installed!  Sun Mar 29, 2015 1:10 pm Sun Mar 29, 2015 1:10 pm | |
| I'll second that motion. If you think opera lights look good, then it doesn't matter what anyone else thinks: it's your car. And whether or not you like opera lights, the installation looks very neat and professional. | |
|
  | |
Sponsored content
 |  Subject: Re: Which Opera light looks better~UPDATE~ Installed! Subject: Re: Which Opera light looks better~UPDATE~ Installed!  | |
| |
|
  | |
| | Which Opera light looks better~UPDATE~ Installed! |  |
|
