The family truxter or G-Pa Mobile as the kids call it...............

Remove rear seat...... Have you ever vacuumed this pig!!

Remove Front seat #1

Remove Front seat #2

Start by placing the shifter in the approx place you would like it. Mike aligned the knob just shy of the pull out drawer when it is out. Avoiding any conflicts.

Set the console in to get a feel and comfort level for the alignment. You will have to live with it for a long time.......

Score or cut the carpet under the brackets & console.......... This made me nervous..........


Remove seat belts and carpet......................

Find rust in rear of car!! Maybe that is just me!! Then re-tiger hair the rear quarter...............

Spread your entire interior over your friends front lawn!!!!

Buy a set of professionally made mounting brackets from Mike and install the factory bracket to the front one.......

Mount the shifter..............

This is the rear bracket.... The top parts mounts to the back of the console with 4 small bolts through the carpet into the top portion of this mount........

Test fit the shifter and front bracket...............

Test fit the console................

Mike used two sheet met screws to hold the bracket in place while we drilled the holes and pop-riveted it into place. He used SS rivets.
Be sure is is aligned front to back and plum to the car. Mike also sealed all of the rivets with HD adhesive caulk. Magic stuff so I am told.

Based on the front bracket and shifter, test fit the rear bracket...................

Hole saw the floor...

DO NOT CRY AT THIS POINT!!!!!

Then use a sawzall to open the two holes to match the blazer grommet on the cable..............

Deny how rusty your car really is TIM!!!! Time for a rear rust proof job!!!!

Mount the bracket on the tranny from the Blazer/Bravada and remove the post cat exhaust hanger...........

Now using a short blade sawzall the hanger mount so the cable has clearance to run with out to many curves...............

Mount the cable into the floor... Be sure to seal it from the top..............

And the bottom.............

Mike found the drive shaft loop to be an ideal place to round and hold the cable..................

Route the cable over the tranny cross member...............

Plug the cable into the tranny pan mount bracket......

Now you will need to remove the factory installed shifter bracket from the side of the tranny and replace it with the bracket you have re-made
three times..... or maybe it was just us. The ball must be facing out, contrary to how it was on the Bravada tranny.
Note that the bracket below
is NOT the correct direction...... You will need to re-connect the stock shift linkage to this piece as well as the blazer cable. This to keep your neutral safety switch, wheel lock
and shift indicator functional..............Be sure to strap the cable up over the gas pedal so it does not become a hazard.............

The inside end of the cable can be mounted to the shifter now..................... Pretty straight forward................

At this point you are pretty much committed to the shifter position. Time to alight the console under the shifter trim and pick the spot
for the rear bracket...............

Align the console and with the top portion of the rear bracket mounted to the console finalize the final resting place for the rear bracket..
Drill and pop rivet............

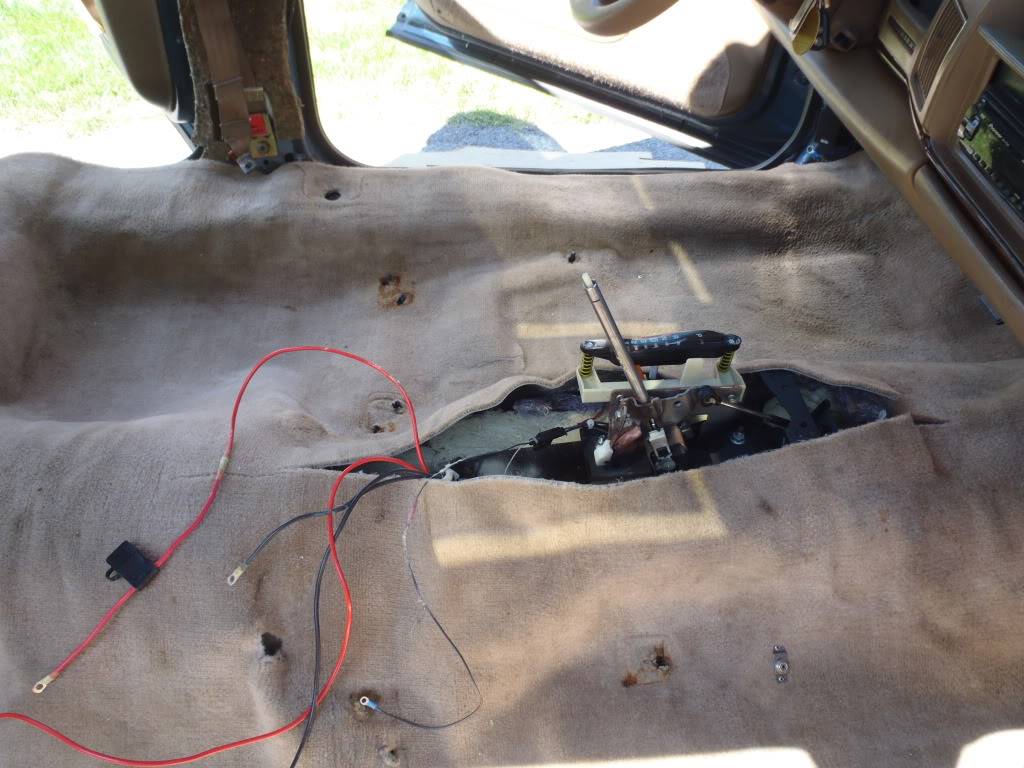
I added accessory ports to the console. These need to be wired up and thought out prior to re-installing carpet.............

I used 10 guage wire and installed a power station of sorts under the console. If I ever want to power anything this is a great spot to have power.

I also ran power to a factory harness to power the 6 way bonnie seat I put in the passenger side............. Not the heavy wire inline fuse and
equally heavy ground wire going to the shifter frame...........
I know you cannot see it very well, but we used long rectangular piece of insulation to build up the height of the carpet to match the console
to the carpet after the install. This is huge to make it look factory.... Look carfully under the carpet on the far side of the shifter. You will
need to do this the entire length of the console..... The insulation was about 3 inches thick x 3 inches deep..........

Drive the pin out of the factory shift lever and remove........ Others have refinished this, but I will leave for now.............

Assemble the console............


Re-install two passenger seats...... Or be indecisive like me and mix and match..............
 I cannot say thank you enough to Mike!!!!!!!!!!!! I love this mod!!!!!!!!!!!!!